Squashed Pumpkin Soups (and other ideas)
Or just regular pumpkins…or any winter squash.
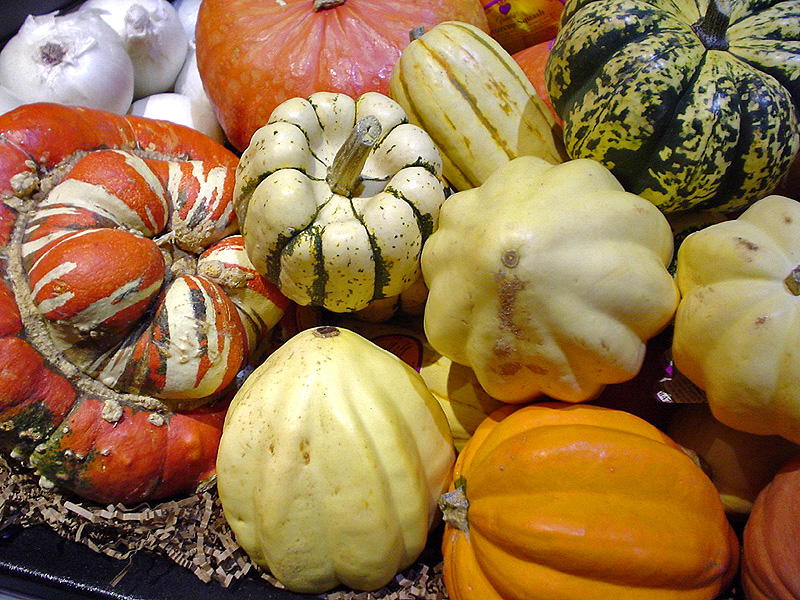
wikipedia commons, Creative Commons license
photo by Californiacondor, 2006
Maybe you are part of a winter produce share, like we are. (Nourish Organic Market in Grand Rapids has a terrific winter share that we’re receiving…we get 1-2 little squashes a week plus other produce, like these teeny tiny heads of lettuce from Vertical Paradise Farms.) Squash is a mixed blessing in our family. When I said, “Would you like parsley pesto pasta or a pasta with squash for Valentine’s Day?” my husband replied, “Squash is not at all celebratory.”
Ok, then. We had the parsley pesto pasta.
But I like squash and we manage to get a lot of it. A few years ago, I shared some seeds for an heirloom variety of butternut squash with my mother. She shared it with my sister out in rural Iowa who still has volunteers coming up every year, even though she stopped planting them. She said she had over 50 squash volunteer this year. She’s feeding them to her chickens, and oh my goodness, are those yolks orange!.
If you have 50 or volunteer squash or just 1 pumpkin you bought at the supermarket, consider trying one of the following recipes I’ve previously posted:
Pumpkin Breads (Cider Pumpkin bread, for one) and Cakes
Bean & Hominy Potpie (with butternut squash inside)
Pumpkin Muffins AND Pineapple Pumpkin Muffins
I frequently substitute pumpkin for squash and vice-versa.
I also enjoy pumpkin stew…here’s a Better Homes & Gardens recipe I’ve made numerous times called Pumpkin Cider Stew. It recommends serving the stew in miniature bowls made out of pumpkins, but I don’t go for that. We already have bowls & there’s enough pumpkin in this recipe already. (This is a DELICIOUS stew. I highly recommend it. Click here to get the recipe.)
Last week, I made a Pumpkin-Leek Soup (click here for the recipe) from Real Simple October 2007. I used some turkey stock that had been in the freezer and it made the soup really strong, but the texture was good. You could also substitute vegetable stock if you want a vegetarian soup.
What do you like to do with winter squash?
Valentine’s Day Brownies
Last year, I posted Valentine’s Day Chocolate Desserts, including these beautiful chocolate and peppermint cookies.

In 2011, I posted about Valentine’s Day generally and some of our household traditions.
In case you want to celebrate Valentine’s Day with your family, or with your spouse or partner, here are a few tried-and-tested brownie recipes for you to try. I’ve shared other brownie recipes in the past: cream cheese brownies, for one. I’ve probably said this before, but brownies are my favorite dessert and I could probably eat a whole pan of them. Which is why the brownies I made on Sunday are in a Tupperware container on top of the refrigerator. Out of sight helps!
Here are 5 brownie recipes…I’m sure you’ll have the ingredients for at least one of them today!
The July 2009 issue of (guess which magazine…) bon appetit featured a recipe for Cappuccino Brownies that has a white chocolate ganache on top…just like foamed milk on top of a cappuccino. Click here for the recipe. These are delicious. I would recommend a special trip to the store just to buy white chocolate in order for you to make them for your Valentine. (But don’t let NOT having a Valentine stop you from making them. I’d recommend having someone to share them with, though…)
Another tried-and-true (and tried and tried and tried, because it’s a Cook’s Illustrated recipe) is the one for Classic Brownies. (In case you’re unfamiliar with Cook’s Illustrated, they test everything a bajillion times with all sorts of variations, in a very scientific way, in order to find the best and most likely to be cooked-at-home recipe. In other words: good with no strange ingredients.) There was a great article about Christopher Kimball, CI editor, in The New York Times Magazine back in October. Anyway, Cook’s Illustrated doesn’t usually make their recipes available to non-subscribers, but other bloggers publish them. Here’s the brownie recipe on Smitten Kitchen blog.
If you have even fewer pantry ingredients, you could try Best Brownies, a brownie classic. It’s good with or without the frosting and calls for cocoa powder rather than unsweetened chocolate, making it a little lighter for your pocketbook. (Or wallet…I know people who carry wallets also like brownies!) My note to self about Best Brownies is that it tastes like a mix, which is a strange but true (and good!) compliment.
And, another simple brownie recipe that calls for unsweetened chocolate, is Old-Fashioned Brownies. These make a BIG pan, so this is for someone cooking for a crowd.
And, finally, the brownies sitting on top of my fridge, Triple Fudge Brownies. This is from The Best of the Best from the Great Plains Cookbook. It’s a chemical cake (you’ll see what I mean when you read the instructions!), I admit it. But it is very good.
Triple Fudge Brownies
1 (3.9 oz.) package instant chocolate pudding mix
1 package chocolate cake mix
2 C. semisweet chocolate chips
milk
confectioners’ sugar
Prepare pudding according to package directions. Whisk in cake mix. Stir in chocolate chips. Pour into greased 15 by 10 by 1 inch baking sheet. Bake at 350 for 30-35 minutes or until the top springs back when lightly touched. Dust with confectioners’ sugar. Yields 4 dozen.
Happy Valentine’s Day!
Porridge: ReMixed
Porridge.
Gruel. (Oliver, anyone?)
Oatmeal.
I’m guessing you have some emotional baggage attached to these words. I remember winter morning oatmeal when I was a child, the way the oatmeal congealed. I wasn’t a fan. (See, Mom, I’m not really complaining…)
Anyway, I have found new delight in porridge. In this month’s issue of bon appetit, which is one of my favorite food magazines, the magazine staffers contributed their favorite breakfast recipes and I’ve tried the same one at least 3 times. It’s an overnight porridge made with steel-cut oats and quinoa (although I ran out of quinoa and started substituting teff. It worked.) Sadly, the recipe is not yet up on their website, otherwise I’d link to it. Please try this recipe; I guarantee, you won’t regret it! Thank you, Carla Lalli Music, BA Food & Features Editor! We love your recipe. (It serves about 5, by the way, even though the original recipe says it serves 4.)
I am putting this in my own words, but the instructions are the same.
Overnight Porridge
In a medium-sized saucepan put:
1/2 C. dried fruit (I like cranberries.)
1/2 C. steel-cut oats
1/2 C. well-rinsed quinoa OR teff (You can also substitute other grains, I read.)
1/4 C. raisins (though once I put in 1/2 C. and it was still good…)
1 t. kosher salt
1/2 t. ground cinnamon
1/4 t. ground cardamom
4 C. water
Bring to a boil. Cover and turn off the heat. Allow to sit overnight so that the grains can soak up all the water.
In the morning, reheat and serve with milk, maple syrup, toasted shelled pumpkin seeds and toasted walnuts (original recipe) or pecans (what I do.)
You can also substitute other dried fruits & grains. I will try subbing barley for the quinoa soon, and have thought about subbing apricots or dates for the cranberries.
Another porridge I’ve recently tried is Creamy Maple Polenta from bon appetit August 2006. The original recipe says that it’s a side, but I tried it for breakfast the other day and we all enjoyed it. Evelyn even asked more more. 🙂
Basically (click the link above if you want more details), boil 1 C. cornmeal (not grits!), 1 C. water, 3 C. milk (preferably whole) and one teaspoon salt together. Add 2 tablespoons each butter and maple syrup. It’s perfect!
This is the porridge you make for breakfast if you forgot to start the other porridge the night before.
These recipes make me think that if THIS were the “gruel” the workhouse boys had to eat in Oliver! “Food, Glorious Food” never would have been written.
Roasted Vegetables
So…do I start writing without acknowledging my near 3-month hiatus as if nothing happened? (Even though it did…I had a baby! I taught a class! I made a gorgeous Christmas Buche de Noel!–recipe to follow soon!)
I also roasted a lot of vegetables.

http://pixabay.com/en/orange-carrots-white-closeup-food-2794/
Public Domain Image
A delightful shop in town called Nourish Organic Market (after Sally Fallon’s classic Nourishing Traditions) offered a winter vegetable share. One of the things that differentiates this share from others is that the food is from a lot of different farms. So we get some fresh greens, some storage vegetables (like radishes, potatoes, and winter squash) and some lovely herbs. I must say, I like rosemary but one only needs so much! We’ve gotten so much rosemary, all I’ve done is roast vegetables with rosemary. I’ve tried a lot of new (and similar) recipes. Here’s a little library of them:
Roasted Carrots with Feta and Parsley from Martha Stewart Living March 2010
Roasted Root Vegetables from The New York Times Magazine December 2012
Baked Sweet-Potato Chips from Martha Stewart Living October 2007
Roasted Sweet Potato Wedges from Real Simple Living November 2007
And, finally, Quick Roasted Vegetables from the Vancouver Sun October 2001
“Vegetables roasted quickly at a high temperature will be a little crisper, than those roasted slowly. Children often prefer the crisp chip-like texture of these vegetables.”
11/2 pounds root vegetables (carrots, parsnips, potatoes, sweet potatoes or turnips)
2 tablespoons olive oil
1 tablespoon finely chopped fresh herb (oregano, rosemary, sage or thyme)
Salt and pepper
Peel and cut vegetables into slices just under 1/4-inch thick; pat dry with paper towels. In large bowl, combine oil, herb and 1/2 teaspoon salt. Add vegetables to oil mixture and toss to coat.
With slotted spoon, remove vegetables from bowl and place, in single layer, on large greased, rimmed baking sheet.
Roast at 450 F for 18 to 20 minutes or until tender on the inside and crisp on the outside, turning vegetables once half-way through roasting time.
Sprinkle with salt and pepper to taste. Makes 4 servings.
******
The thing about roasting vegetables is that it really doesn’t take a recipe. One you learn the technique: chop vegetables, mix with oil, salt and pepper and herbs (fresh or dried) to your taste then bake at 400-450 until they’re cooked, you’ve got it down. It’s easy and it heats up your kitchen a little on cold winter days like this one.
Don’t forget to subscribe to my new blog!
Dear readers,
I took a 4-month hiatus from blogging, but now I’m back. Please subscribe to my new site, Adventures in Mundane Delight, to read my thoughts on the quotidian (everyday) life. Today I posted about broccoli rabe! (Know what that is????)
Important note to my readers!
Dear readers,
This summer, over the course of the next few weeks, I will be in the process of changing this blog to a more professional webpage because it uses my professional name as the URL. My thoughts on food, recipes and (hopefully!) other ideas, will now be found on Adventures in Mundane Delight, another WordPress blog. I will be updating that one more frequently than this one AND if you subscribed to this one for the food writing, I’d recommend you subscribe to that one because I will not be putting up any more food writing here.
Also, if you have any requests or suggestions for summer recipes, please submit them to me! We have a fridge full of vegetables right now and I’m having loads of fun cooking with them. I can’t wait to share some new ideas with you!
–Joy
Asparagus, Eggs & Scones: Weekend Breakfast
It’s asparagus season in West Michigan! It’s now time to pickle asparagus, make salad or soup with it, or (and this is one of my favorites), have it with eggs for breakfast, lunch OR dinner. (You may also have it for brunch, if, unlike me, you enjoy brunch.)
These are two delicious egg + asparagus recipes. They’re anytime-meals, and even more Michigan-y with the dried cherry scones.
Asparagus Omelet
from Cooks Illustrated, May/June 2007
Makes 1 large omelet, which serves 2 people
I don’t try many Cooks Illustrated recipes because they’re so complicated. However, this one seemed simple and it is certainly delicious.
Recipe Note: When cooking the eggs, it is important to lift the edges of the omelet rather than push them toward the center.
2 tablespoons unsalted butter
1/2 pound asparagus , trimmed of tough ends and cut on bias into 1/4-inch pieces (about 1 1/4 cups)
Table salt and ground black pepper
1 medium shallot , halved and sliced thin
1 teaspoon fresh lemon juice
5 large eggs
1 1/2 ounces Gruyere cheese , finely grated (about 1/2 cup) (Joy’s note: You can also substitute another cheese, based on what you have on hand. )
1. Heat 1 tablespoon butter in 10-inch nonstick skillet over medium-high heat; when foaming subsides, add asparagus, pinch salt, and pepper to taste. Cook, stirring occasionally, for 2 minutes. Add shallot and continue cooking, stirring occasionally, until asparagus is lightly browned and tender, 2 to 4 minutes longer. Add lemon juice and toss to coat; transfer to bowl. While asparagus cooks, beat eggs and salt and pepper to taste with fork in small bowl until combined.
2. Wipe skillet clean with paper towel. Heat remaining 1 tablespoon butter in skillet over medium-low heat; when foaming subsides, pour in eggs. Cook, without stirring, until eggs begin to set, 45 seconds to 1 minute. Using rubber spatula, lift edge of cooked egg, then tilt pan to one side so that uncooked egg runs underneath. Repeat process, working around pan edge. Using spatula, gently scrape uncooked egg toward rim of skillet, until top is just slightly wet. Entire process should take 1 1/2 to 2 minutes. Let pan sit on heat without moving for 30 seconds. Remove pan from heat, sprinkle asparagus mixture in even layer over omelet, then sprinkle cheese evenly over asparagus. Cover and let stand until eggs no longer appear wet, 4 to 5 minutes.
3. Return skillet to medium heat for 30 seconds. Using rubber spatula, loosen edges of omelet from skillet. Slide omelet halfway out of pan onto serving plate. Tilt pan so top of omelet folds over itself. Cut omelet in half; using large, thin spatula, transfer to individual plates and serve immediately.
If you have a hankering for a more simple recipe for asparagus and eggs, try:
Not Your Mother’s Scrambled Eggs
I got this recipe from the Crane Dance Farm stall at the Fulton Street Farmer’s Market several years ago. This is delicious and simple–and especially good with eggs from chicken that graze.
1/4 C. garlic scapes, chopped
1 T. olive oil
6 asparagus spears, cut into 1/2″ lengths
4 eggs
1 T. water
4 oz. crumbled French goat cheese
Heat olive oil in a skillet (nonstick or cast iron) on medium-high heat, add garlic scapes. Saute’ for 1 minute. Add asparagus and saute’ for 3 minutes more. Add eggs beaten with water to skillet, stirring until almost set. Add goat cheese; stir until barely melted.
Before you cook the eggs, stick a batch of these in the oven. You may, of course, substitute other dried fruits for the cherries, but the cherries are quite delicious!
Dried Cherry Scones
from Gourmet, August 2008
- 4 cups sifted cake flour (not self-rising; sift before measuring)
- 1/2 cup sugar plus more for sprinkling
- 1 tablespoon baking powder
- 1 teaspoon salt
- 1 1/2 sticks cold unsalted butter, cut into 1/2-inch pieces
- 1 cup dried cherries
- 1 large egg
- 1 cup heavy cream plus additional for brushing (I have used 1/2 and 1/2 to cut down on fat.)
Preheat oven to 375°F with rack in middle.
Whisk together flour, sugar, baking powder, and salt in a large bowl. Scatter butter on top and blend with your fingertips until mixture resembles coarse meal. Mix in dried cherries.
Whisk together egg and cream in a small bowl, then fold into flour mixture until dough just comes together (dough will be quite delicate).
Turn out dough onto a lightly floured surface. With floured hands, press into a 1-inch-thick rectangle. Cut out rounds with cutter and arrange 2 inches apart on a parchment-paper-lined baking sheet. Gather scraps together and cut out additional scones.
Brush tops of scones with cream and sprinkle lightly with sugar. Bake scones, rotating baking sheet halfway through, until tops are golden, 25 to 30 minutes. Cool on a rack about 10 minutes before serving.
Hummus: Three Variations
When I was in college, some of my friends decided to ban hummus from their weekly gatherings because it was the new popular vegetarian staple and everyone would bring it. Thus, the weekly gatherings were becoming more and more mundane and it was the hummus’ fault. It is probably stories like this that have influenced the evolution of hummus. Traditionally, the ingredients have been standard: chickpeas (garbanzo beans), tahini (sesame seed butter), lemon juice, garlic, and spices. Now, however, you can find all sorts of hummus, variety enough to feed groups of friends week after week without being overly repetitive. Here are three recipes for hummus. The first one can be made with a pot and a spoon; the others will be smoother if you have something to process the hummus in (like a food processor or blender).
Red Lentil Hummus
This is the easiest hummus recipe I have ever seen or tried. It’s hardly “hummus,” in the pure sense of the word, lacking 3 of the standard ingredients, but it works. Though red lentils are a gorgeous orange before they’re cooked, during cooking, they sadly turn brownish yellow. (This recipe is adapted from The Essential Book of Jewish Festival Cooking.)
2 C. red lentils, picked over
2 bay leaves
1 ½ teaspoons salt
4-5 large garlic cloves, pressed
1 ½ to 2 teaspoons dried oregano (make it tablespoons for fresh)
1/4 C. olive oil
Rinse the lentils by covering them with water, swishing them around, and draining the water with a sieve or small colander. Rinsing is a very important step. Do this until the water is clear.
Put the lentils and bay leaves in a large saucepan with water to cover the lentils an additional one and one-half inches. Bring to a boil and lower the heat. Skim off the foam that develops on top. (You don’t have to baby-sit the pot, just keep an eye on it and remove the foam when there’s a lot. You probably won’t get it all; that’s OK.) Cover and cook over low heat for 45 minutes, stirring occasionally. Continue to keep an eye on the top. Sometimes the foam will reach the lid and boil over. If this happens, turn the heat down a bit and wipe up the mess. There should be a bit of water left on the top when the lentils are finished. Remove the bay leaves.
Beat the mixture with a spoon until it is a smooth mash, and the water is mixed in. In a small bowl, mix the salt, garlic, oregano, and olive oil, and stir briskly into to lentil mash. Add black pepper to taste.
Adzuki Bean Hummus
A more traditional recipe, this hummus uses adzuki beans, an important legume in Korea and Japan. This recipe also calls for kombu or kelp, an edible seaweed. When we lived in BC, I used dried BC kelp, which I could get at many markets that specialize in Asian and health foods. (You can leave it out, if you want, but the hummus will be less flavourful.) You could substitute nori (sushi wraps) for the kombu.
1 C. dry adzuki beans
4 inch piece kombu or kelp
Place the above ingredients in a heavy pot with water to cover the beans several inches. Bring to a boil, reduce to simmer, and cook for at least 1-2 hours or until soft.
Add:
2 T. tahini
4 T. rice vinegar
1 ½ t. ground coriander seeds
1-2 T. fresh grated ginger
½ t. sea salt or Kosher salt
lime juice (optional)
Mix together. If you have a blender or food processor, process until smooth. If not, mash together with a potato masher. Add lime juice if necessary for flavor, if you like.
Pinto Bean Hummus
Pinto beans are medium-sized beans, beige overlaid with brown dappling. I just made this recipe with Evelyn again last week; we picked mint and wild chives from our yard. Evelyn loves to eat mint! She’ll eat a whole sprig as a little snack.
To make this recipe, follow the instructions for the above hummus recipe, using the following ingredients:
1 C. dry pinto beans (or 2 cups cooked)
1 C. chopped scallions (green onions)
1 T. roasted garlic (Roast the 3-5 unpeeled cloves of garlic in the oven; when it is soft, squeeze it out of the skin.)
¼ C. fresh mint leaves, sliced (or 1 Tablespoon dried)
¼ t. ground black pepper
½ t. sea salt or Kosher salt
1/8 t. cayenne pepper
2 T. lemon juice, more for thinning if necessary
If you like, add the scallions and mint after the hummus is processed or pureed for added colour and texture
Hummus can be eaten with tortilla chips, pita wedges, or with lettuce, tomato, yogurt, and feta cheese in pita halves. Or, if no one’s around, you can just dip your finger into it and lick it off.
The Pumpkin at the Bottom of the Freezer
Maybe you’re imagining a whole pumpkin. Maybe, in your imagination, it was one that had been carved for Halloween and it now has icicles hanging out of its eye holes. Well, if you are imagining this, please know that my freezer is not that exciting–especially at this time of year. I have a confession: I think I like winter squash and pumpkin more than I actually like it. I think it’s mostly bland, unless it’s cooked with sausage or a roast. And I can manage it in baked goods.
In the fall, like all other falls, and with a heart full of good intentions, I purchase a box or two of winter squash at the Farmer’s Market. And every year, without fail, some (3? 5? 7?) of those squash end up in our compost. Thank God we compost, or I would keep this my dirty little mouldy squash secret. Sometimes squash seeds start growing in the compost in the spring.
Also, without fail, I take the rest of the squash, bake it, scoop out the insides, and freeze it. This is the pumpkin at the bottom of the freezer. And it will behoove me to say that it I am using the royal “I” here. My husband, much to his chagrin, often helps with this chore. And he has made it very clear to me that he is even more ambivalent than I am about winter squash.
“So,” you ask, “Why have you waxed so eloquently about squash in the past?” Well, maybe I was doing what I thought was good: encouraging vegetable consumption. And I do like squash, I just don’t love it. It’s like that friend that you always know will be there, but sometimes they’re just not that fun. (Maybe we’re all like squash at times. Maybe it’s the realization that we’re not all hot-shot fancy tomatoes.)
But I am using the pumpkin at the bottom of the freezer to make food and have been trying quite a few new (and old) recipes. Here are some we’ve particularly enjoyed.
Cider Pumpkin Bread
- Heat oven to 350°F. Grease and flour bottom only of 9×5-inch loaf pan. In large bowl, combine brown sugar, pumpkin, oil, apple cider and egg; mix well.
- Lightly spoon flour into measuring cup; level off. Add all purpose flour, whole wheat flour, baking powder and cinnamon; stir just until moistened. Stir in nuts and raisins. Pour into greased and floured pan.
- Bake at 350°F. for 55 to 65 minutes or until toothpick inserted in center comes out clean. Cool 10 minutes. Remove from pan; cool completely. Wrap tightly and store in refrigerator.
Peanut Butter Pumpkin Bread
3 cups sugar (I usually reduce this to 2 cups.)
1 (15 ounce) can solid pack pumpkin OR 2 C. frozen, thawed & drained pumpkin puree
4 eggs
1 cup vegetable oil
3/4 cup water
2/3 cup peanut butter
3 1/2 cups all-purpose flour (Substitute up to 2 C. with white whole-wheat flour.)
2 teaspoons baking soda
1 1/2 teaspoons salt
1 teaspoon ground cinnamon
1 teaspoon ground nutmeg
Directions:
In a mixing bowl, combine the sugar, pumpkin, eggs, oil, water and peanut butter; beat well. Combine the flour, baking soda, salt, cinnamon and nutmeg. Gradually add to pumpkin mixture; mix well. Pour into two greased 9-in. x 5-in. x 3-in. loaf pans. Bake at 350 degrees F for 60-70 minutes or until a toothpick comes out clean. Cool for 10 minutes before removing from pans to wire racks.
Delicious Pumpkin Cake
- 4 eggs
- 1 2/3 Cups sugar
- 2 Cups pureed pumpkin (Libbys in a can is good)
- 1 Cup vegetable oil
- 2 tsp. pumpkin pie spice
- 1 tsp. vanilla extract
- 2 Cups flour
- 2 tsp. baking powder
- 1 tsp. baking soda
- 1/2 tsp. salt
- 1/2 Cup chopped nuts (walnuts or pecans)
Frosting:
- 3-4 oz. cream cheese (about half a small size package)
- 1/2 Cup butter (room temperature)
- 3/4 Cup powdered sugar
- 1 tsp. vanilla extract
Preheat oven to 350°. In a large bowl, beat eggs until frothy. Add sugar, pumpkin, oil, pumpkin pie spice and vanilla and beat until well blended. Add the flour, baking powder, baking soda, salt, and nuts, mix gently to combine. Pour into an ungreased 9″ x 13″ pan, bake for 30-40 minutes, until the cake is golden brown. It should be pulling away from the sides of the pan a bit, and will spring back when lightly pressed. Remove from oven and let cool at least an hour before frosting.
To prepare frosting: Beat cream cheese and room temperature butter with powdered sugar and vanilla extract until well blended and fluffy. Add a bit more powdered sugar if a stiffer frosting is desired. Spoon the frosting onto the center of the cake and spread toward the edges until the cake is evenly frosted. If you want to be really decadent, the frosting recipe can be doubled for extra thick icing, a real kid pleaser. (I have not done this, but let me tell you, I am tempted.)

